
Every major industry is implementing Apache Hadoop as the standard framework for big data processing and storage. Hadoop is designed to be deployed across a network of hundreds or even thousands of dedicated servers. All these machines work together to deal with large volumes and huge data sets
See more : Overview of Hadoop
![]()
Hadoop is powerful and useful only when installed and exploited on multiple nodes, but for beginners, Hadoop Single node is a great start to get acquainted with hadoop. In this article, I will guide you to deploy Hadoop on 1 node (Hadoop Single node).
Conditions before installation
- Your device must have jdk (version 8, 11 or 15 is fine, note that if you use hadoop 3.1.4, you can use jdk8, but if you use hadoop 3.2.2 or higher, use Java 11 or higher), if If not, you can install it with the following command:
1
sudo apt-get install openjdk-11-jdk -y
- Your computer has SSH client and SSH server. If you don’t have it, you can install it with the following command:
1
sudo apt-get install openssh-server openssh-client -y
Set up User for Hadoop
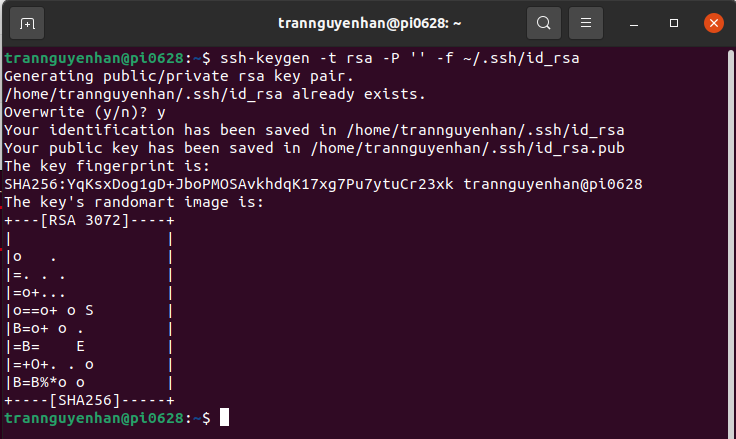
Generate an SSH key pair and determine where it will be stored:
1
ssh-keygen -t rsa -P '' -f ~/.ssh/id_rsa
The system will proceed to create and save the SSH key pair:
Using cat command to save public key to authorized_keys in SSH directory:
1
cat ~/.ssh/id_rsa.pub >> ~/.ssh/authorized_keys
Delegate user permissions with the chmod command :
1
chmod 0600 ~/.ssh/authorized_keys
Verify everything is set up correctly by ssh to localhost:
1
ssh localhost
Download and Install Hadoop on Ubuntu
Download a version of Hadoop from the official Hadoop distribution site at: https://hadoop.apache.org/releases.html
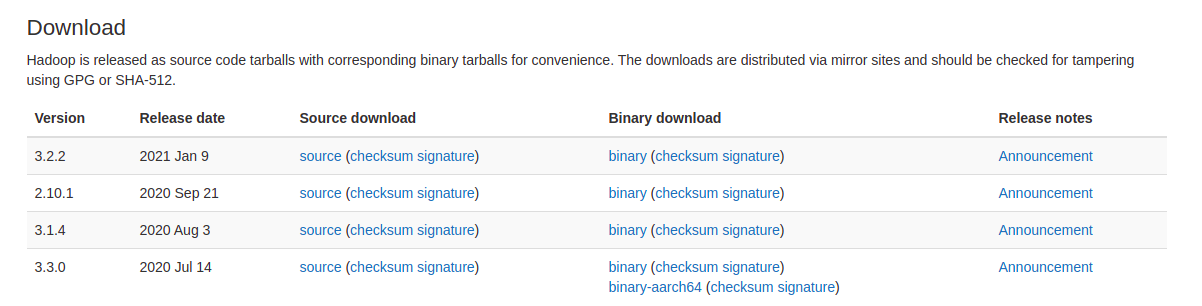
Click on the binary in Binary download
Now put the compressed file you just downloaded anywhere and extract it with the command:
1
tar xvzf hadoop-3.2.2.tar.gz
Configuring and Deploying Hadoop Single Node (Pseudo-Distributed Mode)
To configure Hadoop for pseudo-distributed mode, we will edit the Hadoop configuration files in the etc/hadoop path and in the environment configuration file including the following files:
.bashrchadoop-env.shcore-site.xmlhdfs-site.xmlmapred-site.xmlyarn-site.xml
Note: In the installation below, my Hadoop is placed in the folder /opt/myapp, you can put Hadoop anywhere, it doesn’t have to be the same as me.
Configure Hadoop environment variables (file .bashrc)
Open file .bashrc with nano :
1
sudo nano ~/.bashrc
Define Hadoop enviroment by adding some variable below at end of the file (edit your hadoop home path match your hadoop path):
1
2
3
4
5
6
7
8
9
10
11
#Hadoop Related Options
JAVA_HOME=/usr/lib/jvm/java-11-openjdk-amd64
export HADOOP_HOME=/opt/myapp/hadoop-3.2.2
export HADOOP_INSTALL=$HADOOP_HOME
export HADOOP_MAPRED_HOME=$HADOOP_HOME
export HADOOP_COMMON_HOME=$HADOOP_HOME
export HADOOP_HDFS_HOME=$HADOOP_HOME
export HADOOP_YARN_HOME=$HADOOP_HOME
export HADOOP_COMMON_LIB_NATIVE_DIR=$HADOOP_HOME/lib/native
export PATH=$PATH:$HADOOP_HOME/sbin:$HADOOP_HOME/bin
export HADOOP_OPTS="-Djava.library.path=$HADOOP_HOME/lib/native"
Apply change with command: source ~/.bashrc
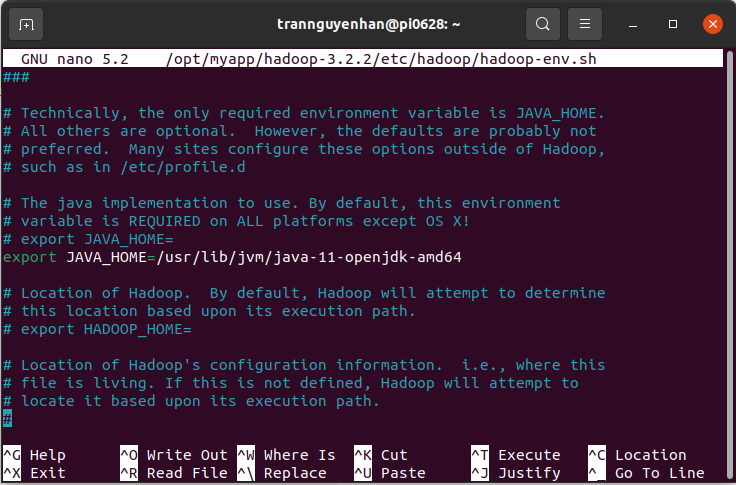
Edit file hadoop-env
open file hadoop-env.sh with nano:
1
sudo nano $HADOOP_HOME/etc/hadoop/hadoop-env.sh
Find the location as shown below, uncomment (remove sign #) the JAVA_HOME and add your openjdk path:
Edit file core-site.xml
Open file core-site.xml with nano:
1
sudo nano $HADOOP_HOME/etc/hadoop/core-site.xml
Add between 2 tags configuration to get the full content as follows:
1
2
3
4
5
6
7
8
9
10
<configuration>
<property>
	<name>hadoop.tmp.dir</name>
	<value>/opt/myapp/hadoop-3.2.2/tmpdata</value>
</property>
<property>
	<name>fs.default.name</name>
	<value>hdfs://localhost:9000</value>
</property>
</configuration>
fs.default.name Configure the address of HDFS, if not configured by default it will be placed at port 9000, if there is a duplicate port, change it to another port so Hadoop can operate normally.
Edit file hdfs-site.xml
Open file hdfs-site.xml with nano:
1
sudo nano $HADOOP_HOME/etc/hadoop/hdfs-site.xml
Add between 2 tags configuration to get the full content as follows:
1
2
3
4
5
6
7
8
9
10
11
12
13
14
<configuration>
<property>
	<name>dfs.data.dir</name>
	<value>/opt/myapp/hadoop-3.2.2/dfsdata/namenode</value>
</property>
<property>
	<name>dfs.data.dir</name>
	<value>/opt/myapp/hadoop-3.2.2/dfsdata/datanode</value>
</property>
<property>
	<name>dfs.replication</name>
	<value>2</value>
</property>
</configuration>
dfs.replication configure the number of copies.
Edit file mapred-site.xml
Open file mapred-site.xml with nano:
1
sudo nano $HADOOP_HOME/etc/hadoop/mapred-site.xml
Add between 2 tags configuration to get the full content as follows:
1
2
3
4
5
6
<configuration>
<property>
	<name>mapreduce.framework.name</name>
	<value>yarn</value>
</property>
</configuration>
Open file yarn-site.xml
Open file yarn-site.xml with nano:
1
sudo nano $HADOOP_HOME/etc/hadoop/yarn-site.xml
Add between 2 tags configuration to get the full content as follows:
1
2
3
4
5
6
7
8
9
10
11
12
13
14
15
16
17
18
19
20
21
22
<configuration>
<property>
	<name>yarn.nodemanager.aux-services</name>
	<value>mapreduce_shuffle</value>
</property>
<property>
	<name>yarn.nodemanager.aux-services.mapreduce.shuffle.class</name>
	<value>org.apache.hadoop.mapred.ShuffleHandler</value>
</property>
<property>
	<name>yarn.resourcemanager.hostname</name>
	<value>127.0.0.1</value>
</property>
<property>
	<name>yarn.acl.enable</name>
	<value>0</value>
</property>
<property>
	<name>yarn.nodemanager.env-whitelist</name>
	<value>JAVA_HOME,HADOOP_COMMON_HOME,HADOOP_HDFS_HOME,HADOOP_CONF_DIR,CLASSPATH_PERPEND_DISTCACHE,HADOOP_YARN_HOME,HADOOP_MAPRED_HOME</value>
</property>
</configuration>
Format HDFS namenode
Format namenode before start first service:
1
hdfs namenode -format
Start Hadoop Cluster
In sbin, start hadoop with command:
1
./start-all.sh
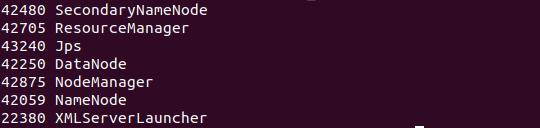
Check daemon running with command:
1
jps
If the result is 6 daemons as follows, then you have configured correctly (you only pay attention to the 6 daemons above, you don’t need to care about XMLServerLauncher):
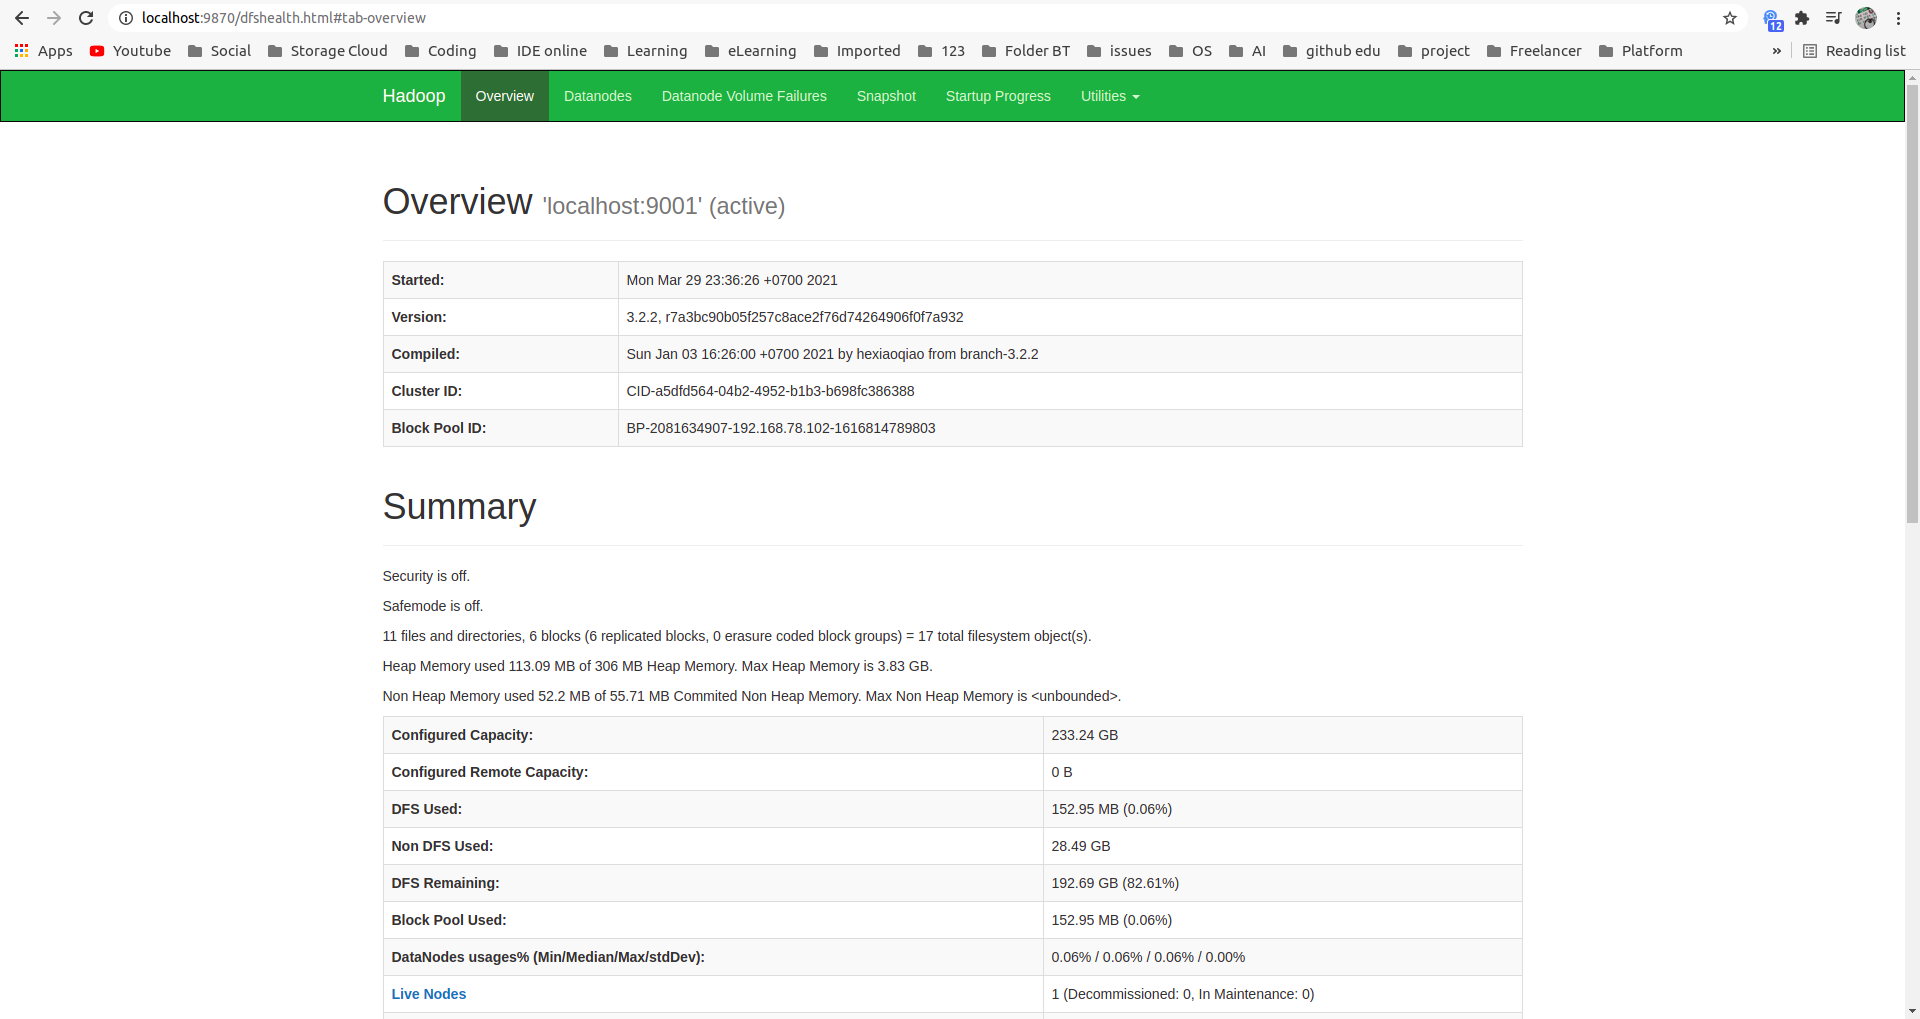
Access Hadoop UI from the browser
You can check whether Hadoop has been installed successfully or not at namenode’s default port 9870:
1
localhost:9870
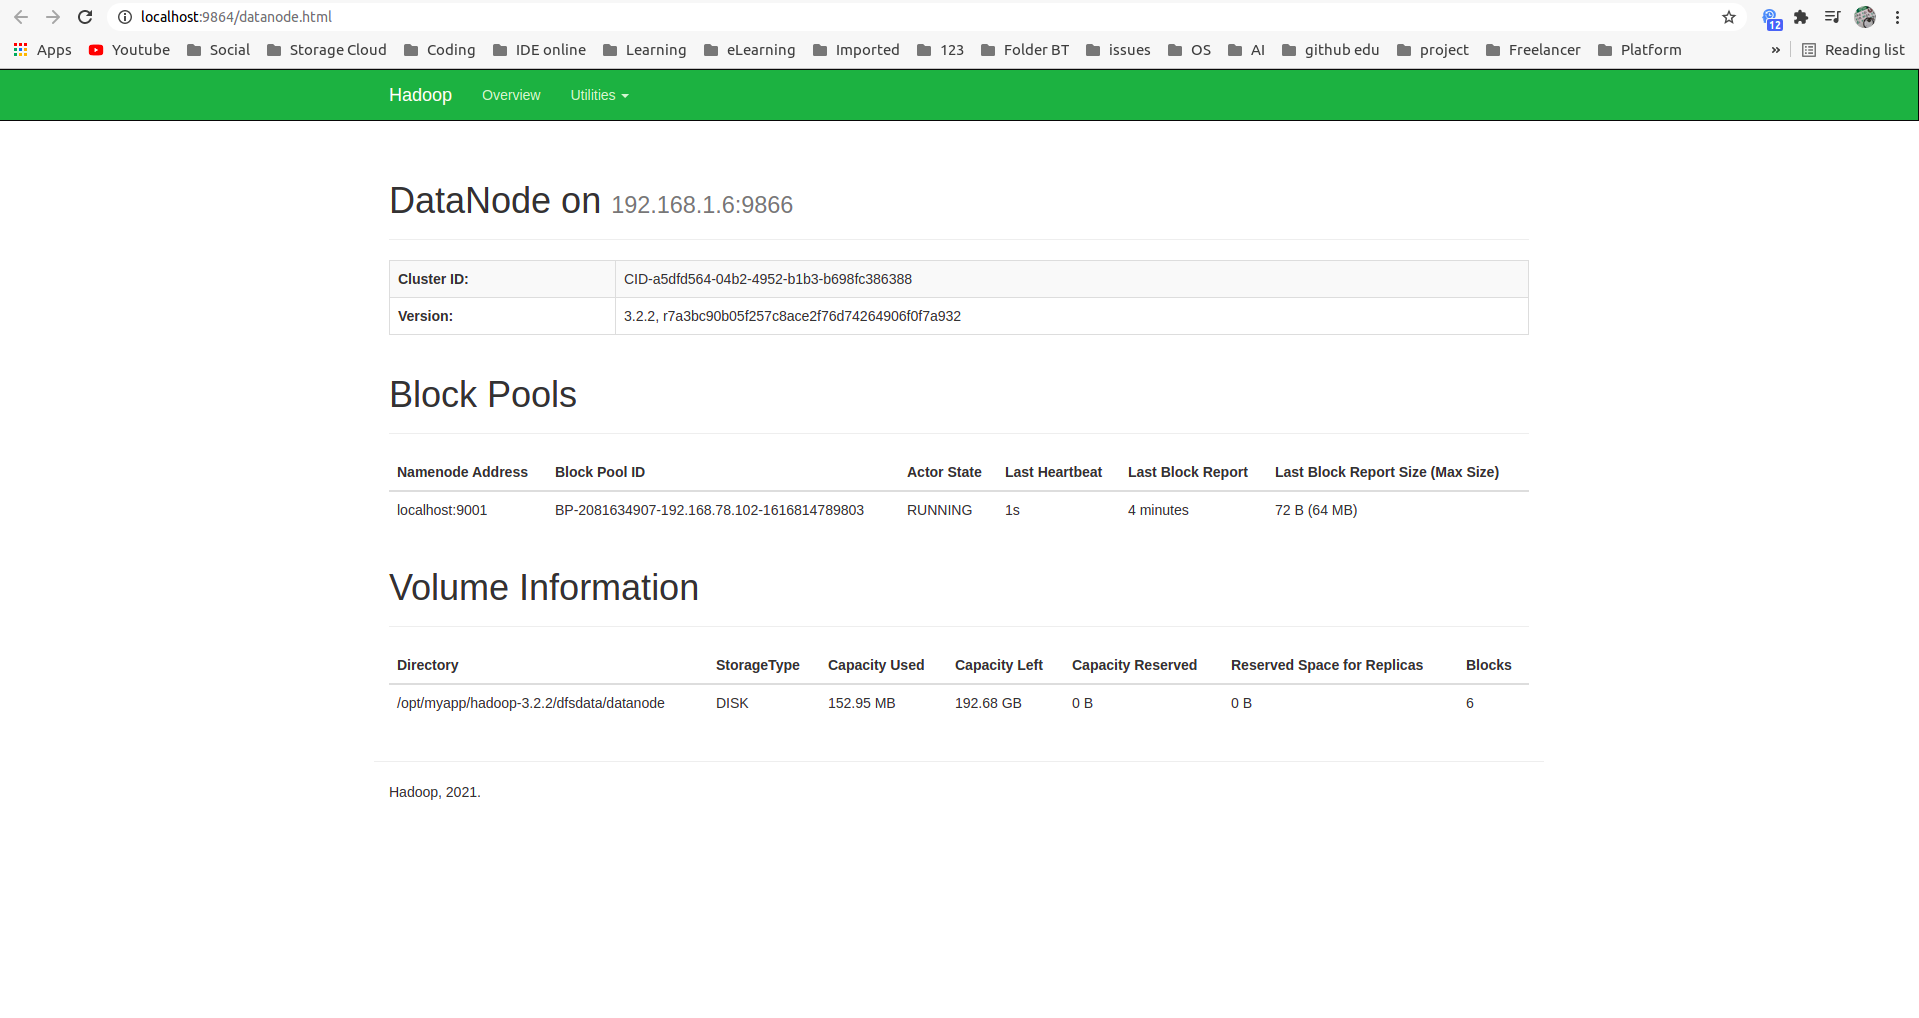
Check datanode at default port 9864:
1
localhost:9864
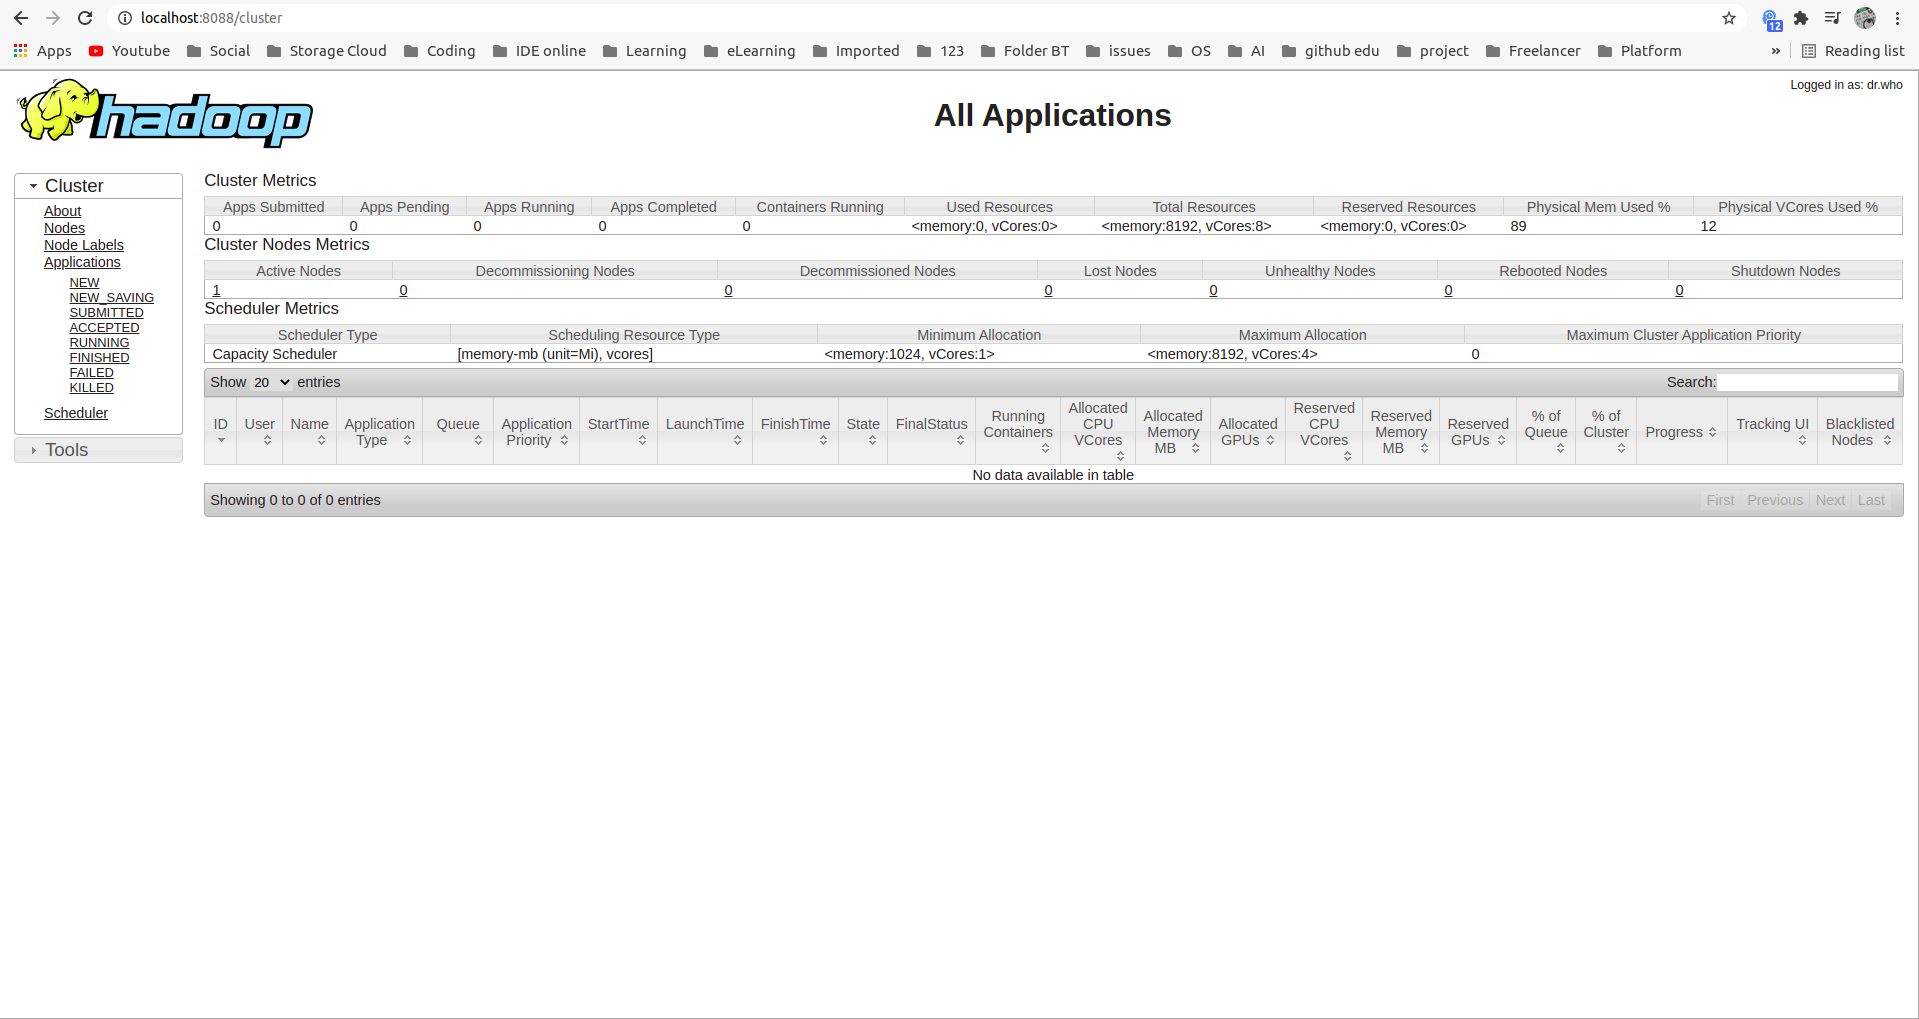
Check out the Yarn resource manager at the portal 8088:
1
locahost:8088
Reference: https://phoenixnap.com/